Showing posts with label quilts. Show all posts

Monday, September 05, 2011

Labor Day blues

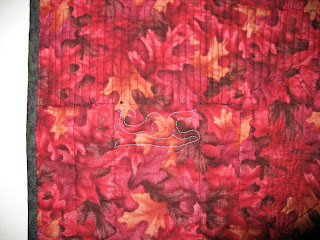
I finally finished my quilt for my son, even though he left for college 2 weeks ago! I always underestimate how long quilts take to make! This one is 72in X 88 in, the size for a Twin bed, and is made of mostly blue and white fabrics which I had on hand. Some are rather old ( one was used as a maternity dress when I was carrying him), one was used in his Bar-Mitzvah quilt, several were used in "Crystal Blues", a quilt I made in 1998, whic I still enjoy. I also bought a few  new pieces of fabric for this quilt. It is machine pieced and quilted, with a walking foot for the body of the quilt, but with free motion for the border. I also machine applied the binding. It was a challenge to photograph this huge thing! I hope he likes it...

Wednesday, August 10, 2011

Baby Cat

As I am getting my kids ready to go off to college, and thinking about my "empty nest", naturally I recall how much fun it was to have a new baby in the house, and fondly recall the fun of each of my children's growth and childhood. It is incredible to me that these young men are ready to enter the world, albeit the relatively safer realm of college, but still my house will be quiet! Except for the 2 cats, of course. They would keep me busy. And my older son requested a quilt for his bed, so I have been busily sewing and cutting and enjoying watching that take place.


Meanwhile, last night at 6pm my son's Japanese teacher  called in a panic, as she had found a baby kitten in the road near her house and didn't know what to do with it, but couldn't keep it because of her dog being too aggressive. She had called her vet who said they maybe could take it later today, but she needed someone to take it  for the night. I agreed to take it over night, so she dropped off this little kitten. And I mean little. Its eyes were still closed, and the umbilical cord was hanging off it, so it probably was 2 days old if that. I had some cat milk and an eye dropper, and Bobby and I made it a warm nest with a hot water bottle and one of those plastic boxes and an old towel. It mewed pitifully, and we tried to feed it while I called shelters and vets offices which were all closed, and I concluded it wasn't going anywhere last night. My younger son, who loves kittens, was up till 4:30 am with it, and I got up at 9 and resumed feeding, trying to get it to pee ( mother cats lick their babies butts to make them pee, so the website I found ( http://www.kitten-rescue.com/) suggested cotton balls and warm water....it was very stressful as it kept mewing for its mother and was kind of freaked out, but so cute and fluffy and tiny! Little claws and whiskers! I was relieved and sorry when Mako came to take it at 1:30, but it was good because by then I had remembered the anxiety and the stress of babies, their incessant neediness, and their inability to be alone for a moment, and the huge feeling of responsibility for a tiny creature, adorable as it was, was too much for me! I am glad and proud of my kids going off to college, and I did my bit, so perhaps it is time for a new phase of life, with a bit more freedom to do as I please! I still have to sell the house, so there is a lot to keep me occupied.....

Wednesday, May 04, 2011

Waiting for

In the midst of cleaning and decluttering the studio, and my house, it is difficult to create things, as one doesn't want to make a big mess.But what could be neater than doing a big quilting project where the design hinges on the quilting itself?

At least 5 years ago, I dyed 2 pieces of fabric in a radiating color pattern, and drew a design on one piece. Then it sat for a long time, as I was hesitant to find the perfect way to quilt it. Last month I got inspired to use black thread and just go for it, using as many references as I could to find for patterns for the areas to be quilted. I used "The Grammar of Ornament" by Owen Jones as a kind of reference manual, and when I got stuck for inspiration, I would open it at random and see what patterns spiked my fancy. Then I adapted them for quilting patterns. Co-incidentally, my friend Elizabeth (  http://www.elizabethrosenberg.com/weblog/ )    had been doodling with marvelous designs, and somehow I heard about Zentangles, so I was primed to find lots of doodle inspiration to guide my quilting. So, here is the result, "Goodbye New York" 39X39 inches,which won an Honorable Mention at the Northern Star Quilters Guild show this past weekend. And some detail shots:
And I've kind of been on a finish up UFO kick lately, so there are a few sweaters coming to fruition. Of course, in the process of cleaning and sorting I am finding lots of fun ideas and half-finished things which cry out for frogging or for finishing.
So it is fun to make that decision sometimes.
Also, for the Northern Star show, I made a small auction piece, which was kind of a sample, and used hand dyed fabric I made a few years ago, with a portion of the design. I thought it would be good to have a place to experiment, but I ended up doing that piece afterwards. I also quilted the negative space in that one with matching thread, which I thought wasn't as effective as leaving some areas unquilted, as I did with the big one.. It sold at auction, and now has a happy home.
I have designed the outline for the next one, and I'm in the process of quilting that, so hopefully it will turn out as nicely as the first one! . One never knows, in a series. If not, I might have to dye some more fabric...
:

Saturday, March 13, 2010

Math is Everywhere

Lately I've been thinking a lot about math. The amazing spiral produced by my pineapple plant ( with purple flowers!) follows the Fibonacci number sequence ( http://www.world-mysteries.com/sci_17.htm ) and is just lovely. I finished the top of the Tessellation Sampler, which is a quilting exploration of semi-regular tessellations for the next mathematics and needlework book from the group that brought us "Mathematics in Needlework". See my post from 2008 for details about that wonderful book ( http://jeririggs.blogspot.com/2008/01/making-mathematics-with-needlework.html ).

And of course, there is knitting! I finished my second Ingrid Cardigan, this time in blue : yarn:Trendsetter Merino VIII, needle size 8. A very wearable and lovely sweater in my favorite shade of blue!
Pattern available in my Ravelry Store ( http://www.ravelry.com/ , Jeri Rigged Designs).

Tuesday, September 08, 2009

Leafy Wells

The versitility of quilting makes it the ideal medium for exploring color, shape, size, line, pattern, all without getting your hands wet!
But sometimes things just get to be overwhelming and too large to handle. Thus it goes with "Leafy Nights" which is now around 90 inches square. It is really big, compared with my usual size quilt, which is why that one is hibernating for a while while I decide if I want to quilt it myself or let someone else ( with a longarm machine) have that pleasure.

So, as a form of procrastination , and also due to the myriad leftover half-square triangles, bits of strips of fabric, and the gorgeousness of all of these colors, which I can't bear to put away yet, I made another quilt. This one is considerably smaller ( 37 1/2 inches by 62 1/2 inches ), and is meant as a wall hanging. I used the "Hidden Wells" pattern by Mary Ellen Hopkins, which I have loved since the first piece I made with this design in 1994, for the center strip.
I wanted something quick, interesting and not too fussy, to showcase the fabrics, and this pattern fit the bill. Adding leftover triangles, strips and such to the sides made it have an Art Deco feel, and gave me the shape I wanted. The quilting was a challenge, and I used Contact paper templates to quilt around. The side strips I quilted freehand in leafy designs. On the whole I love this quilt, although it is really uncomplicated and peaceful.


And in the end, Leafy Wells is the best revenge. Now I guess I'll have to quit procrastinating. Maybe later....


Wednesday, July 29, 2009

Leafy Nights part 3

I finally finished making 36 of the 4X4 blocks, and had a lot of fun arranging the colors and shades. Then I sewed them together in groups of 4 like this:
You can see how this makes a large blue X in the middle. Given that I want a queen-sized quilt, I need an array of 6X6 small blocks, which turns into a grid of 3X3 larger blocks. When I put together two large blocks, another secondary pattern emerges, like this: So this arrangement turns into Xs and Os. I'm enjoying playing with the blocks, but I think I want to arrange them so the Xs aren't so prominent. I think this will involve sewing 6 big blocks, and then single small blocks on the sides. After that, I'll have to consider borders and quilting...but first I have to clean my studio to have room to lay out all of the blocks!

Tuesday, July 07, 2009

Leafy Nights part 1

Sometimes you just have to make a quilt. As someone who has collected fabric since childhood, I have a lot to choose from, but sometimes that makes it difficult to get started. There is always fabric that is new or better or somehow different, yet I find the same things call to me over time. I decided to make a blue and green bed quilt, as I happen to have a lot of fabric on hand, and those are my favorite colors.I wanted something that would be complex, but not too complex, large, easy and fast, relatively speaking. Something I could enjoy working on without too much frustration, but interesting enough to allow for delight; a block quilt that didn't look like blocks. Sometimes finding a good pattern is the most difficult part of getting started. Making something big is a challenge to handle, so I wanted it to be broken up into squares to make it easier to sew.

I had long admired a quilt called Interwoven by Barbara Graham ( http://www.bgmysteries.com/ ) from the 2004 Quilt Art Engagement Calendar, which was a two color 4x4 patch block pattern, and thought that would be a perfect design. I started cutting 4 inch strips of my favorite blue and light green batiks:


I then cut half- square triangles from each strip and paired them to make unique triangle squares:

Then I cut more blue strips, and then into 4" squares, to make a block:

Now I will make 36 of these, and see what happens. I'm trying to use as many unique combinations as I can, so it is a bit like playing concentration, trying to vary the fabrics chosen in each position of the grid. And keeping the cats from lying on top of them, of course! Back to sewing.

Tuesday, May 26, 2009

Pie Love


About 10 days ago a client came to my studio and wanted to commission a small quilt for a friend's graduation gift. The recipient loved to bake, especially Lemon Meringue pies. Could I make a quilt about that? I drew up some sketches, and we settled on one:


We chose some fabrics that spoke to us of lemons and pies and blue skies, and meringues, and looked at some images on the internet to get the colors right. The top of the pies brown especially at the peaks, but when you cut a slice, the underneath meringue stays white. We liked the idea of the lemon slice overlaying the pie and the words "Pie" and "Love" on it.
I converted the drawing to a pattern on Freezer paper, cut out some pieces and started assembling the quilt.It struck me that I could manipulate the meringue fabric to provide texture, and I loved the result, but then it would be difficult to find a pleasing way to overlay the lemon slice. The bumpy texture of the meringue might make threadpainting bumpy, and fusing fabric over it would also result in lumps. In the end I added a lemon, and used the slice idea in the quilting, as I did with the words, and also some eggs and wheat.
I used fusible batting, so I could hold the texture of the meringue in place while I quilted it. The binding fabric was used on the back as well, and has silver stars in it, so it ties the spoon together with the pie in the sky.When you get lemons, make lemon pie!
The silver spoon added a bit of invitation to enjoy, and the whole thing has a folk arty feel. Yum!
I hope the client likes it, too! I'm not sure of the title yet, but call it "Pie Love" in my mind!
Size: 19 inches X 19 inches.

Saturday, January 03, 2009

Salon Seven Quilt Show


I spent a lot of happy hours this week quilting a quilt that I had begun a few years ago, but never finished due to getting discouraged with quilting and taking a detour into knitting. I had been invited to curate an exhibit in the New Rochelle Library several months ago, and began to realize I should at least have one new work to hang. I dug this partly finished quilt out from where it was resting and had alot of fun quilting it, and when I put the last stitch into it last night at 1am, I was pleased. It is called "Cats are everywhere"( which you can see in the detail of the quilting)... and here is my panel in the exhibit, which we hung today. You'll have to go see the other 37 quilts in the show; it is wonderful! Here is the press release:


The Salon Seven: Stitching it Together
Group Exhibition at New Rochelle Public Library, New Rochelle, New York http://www.nrpl.org/

The Salon Seven announces the opening of their newest exhibition. In a time where the very fabric of society appears to be falling apart at the seams, this group of seven textile artists continues to meet monthly to encourage and support each other while offering constructive critique. When they are together, ideas and creativity flow, excitement fills the air, and the members encourage each other in their individual explorations of color and design, stitching together their own personal view of life’s journey.
The 41 art quilts included in this exhibition, which runs from Saturday, January 3, 2009,through January 24, 2009, exhibit a breathtaking range of styles, textures, colors and subjects yet remain true to the quilt making tradition. Each member of this group has her own way of using textiles, and each uses fabric, thread, and batting to create her distinctive artwork.
Salon Seven members: Benedicte Caneill, Beth Carney, Georgia Heller, Jeri Riggs, Elizabeth Rosenberg, Linda Schoenfeld, Susan Schrott

Artist's Reception: Sunday, January 11, 2009: 1-3pm


Thursday, February 21, 2008

Facings for Quilts

This past week I had the pleasure of teaching two workshops on facing a quilt. The usual methods of applying facings are very bulky at the corners and require a lot of handling of the quilt, so I came up with an easier method. For those who missed it, here is the Jeririgged method of facings for rectangular quilts:
1. Quilt your quilt as desired. Square the edges.
2. Cut 4 strips, 2 1/2 inches wide, one for each side of the quilt, a bit longer than the length of each side of the quilt.
3. Press under 1/4 inch on the long side of each strip. If you want, also cut a strip 1/2 inch wide X the length of each strip out of Wonder Under, and fuse it ( keeping the paper on) atop each folded side on each strip.
4. Choose 2 sides to be the "corner" sides ( opposite each other) and pin strips to quilt matching raw edges. Sew the short edge, starting at the crease , turn the corner with a single stitch on the diagonal, then sew the long edge, gently pulling the strip as you sew to take in some of the stretch of the fabric. If you cut these two strips beforehand, make them 1/4 inch shorter than the width of the quilt and ease it while you sew so they match. Sew to 1/4 inch before the corner, turn at the corner and continue sewing down the short length, stopping just at the fold crease. Trim the facing strip even with the quilt top.


6. Now lay long edges with raw edges aligned, overlapping the first strip only as far as to cover the turned under edge of the first strip. Sew this strip to the side, continuing the line of stitching, 1/4 inch from the edge of the quilt. This leaves the corner with only a single layer, and overlaps the strips an inch down the sides where the bulk will be unobtrusive.Repeat for both pairs of strips, then Clip corners. Now, turn the whole shebang to the back, pushing out the corners to make a sharp edge, and iron them flat. If you used Wonder Under, now remove the paper strips, and fuse the facing in place. You might have to iron carefully to get everything lined up, but the turned edges hide the raw edges of the facings, and the fusable holds it in place until you can slip stitch the edge to finish permanently.

Saturday, January 26, 2008

The Quilt's Power


This quilt, which I made in November and December 2001, was recently juried into a show in the Museum TwentseWell in Enschede, The Netherlands, which will run from April to September, 2008. The quilt is entirely machine pieced, and quilted on my home sewing machine in various patterns. The show is called "De kracht van de quilt, or, The Quilt's power, and features 10 large quilts and 6 small quilts, which were all made in response to the events of 9/11. Here is a wikipedia article which describes the motivation for the show:
http://en.wikipedia.org/wiki/Vuurwerkramp
You can also see more of this quilt on my website ( www.jeririggs.com ) in the first gallery page, at the bottom.

Saturday, December 23, 2006

Goddess of Knitting With Cats

My friend Elizabeth Rosenberg ( (www.Elizabethrosenberg.com and www.elizabethrosenberg.blogspot.com ) initiated "The Goddess Project" and encouraged her friends to create quilts reflecting their own favorite Goddesses.

Because my two cats are always rearranging things in my studio, lying on my latest quilt, helping me wind yarn, sitting on my lap and otherwise being a big part of my life, I decided to play with that theme, so I pulled out all the cat fabric I had and went to work. The shape of the Goddess was given by Elizabeth, but I wanted mine to be wearing a furry dress, surrounded by her minions, lost in the fiber frenzy
that sometimes is my life.

The ball of yarn appeared and the cats were delighted to play with it. I knitted her a vest on tiny needles and added some quilting for foliage in the background. Her name is Perdita: Lost Goddess of Knitting With Cats. Here is a detail so you can see the stitching. The background fabric is hand dyed by me.